AggData can be used in many ways; one program that it lends itself well to is Map Info. The Map Info program is a very effective mapping tool. AggData is the perfect information to create location maps for your use. Simply follow the steps of this tutorial to create your own map.
Step One:
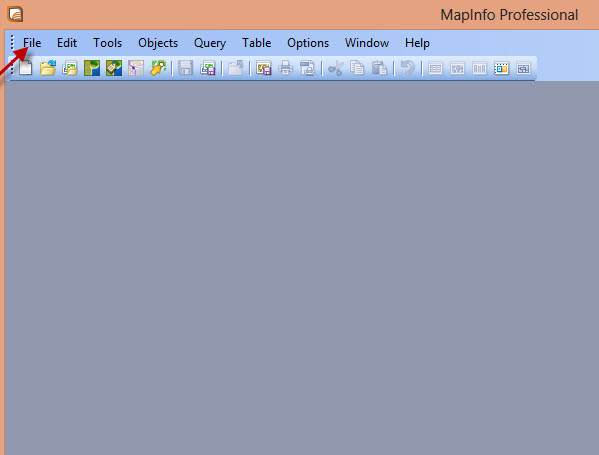
First make sure you have purchased, installed, and logged into Map Info. Once the program is open, click on “File” and select Open.
Step Two:
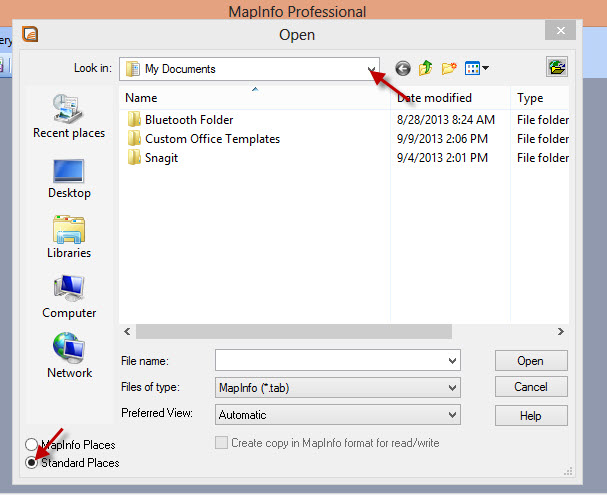
Once the “Open” box appears make sure to click on “Standard Places” in the bottom left so that you can find the document on your computer. Use the pull down menu at the top of the box to locate your AggData’s location.
Step Three:
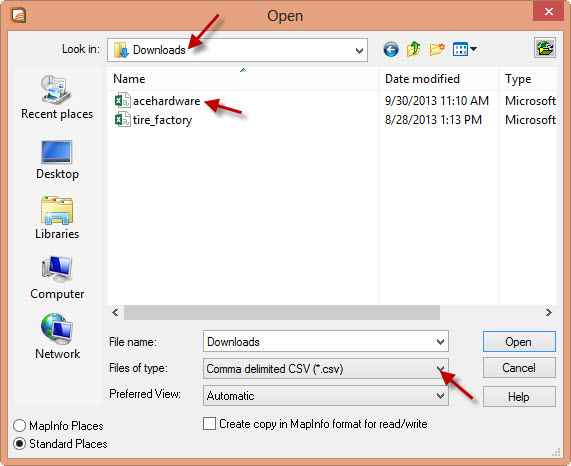
Once the next window opens make sure to first select the “File of Type” as “CSV”, in order to find your AggData. Then from the pull down menu select the locations of your AggData document you would like to use for the map.
Step Four:
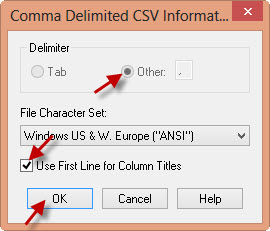
Now a “Comma Delimited CSV Info” box will open. Select “Other” as the delimiter. Click the “Use First Line for Column Titles” box, then hit “OK.”
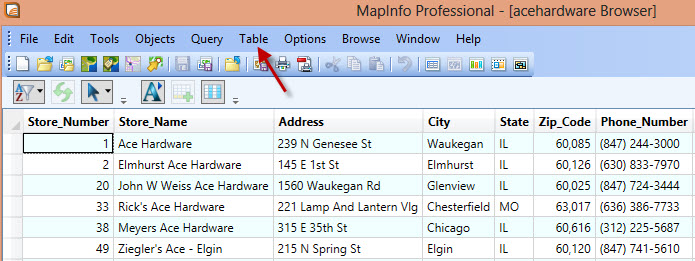
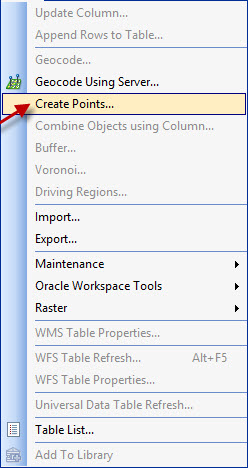
Step Five:
The AggData will open into Map Info. Go to the “Table” tab at the top of the page and click on it, then select “Create Points” from the menu.
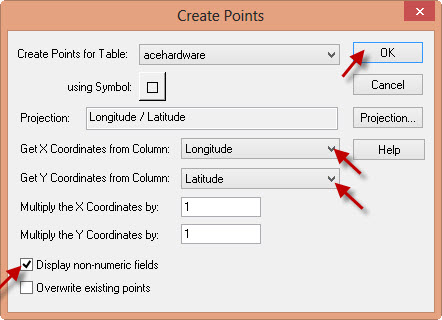
Step Six:
Once the “Create Points” box appears make sure the X Coordinate has “Longitude” selected, and that the Y coordinate has “Latitude” selected. Then check the “Display non-numeric fields” box, and finally click “OK.”
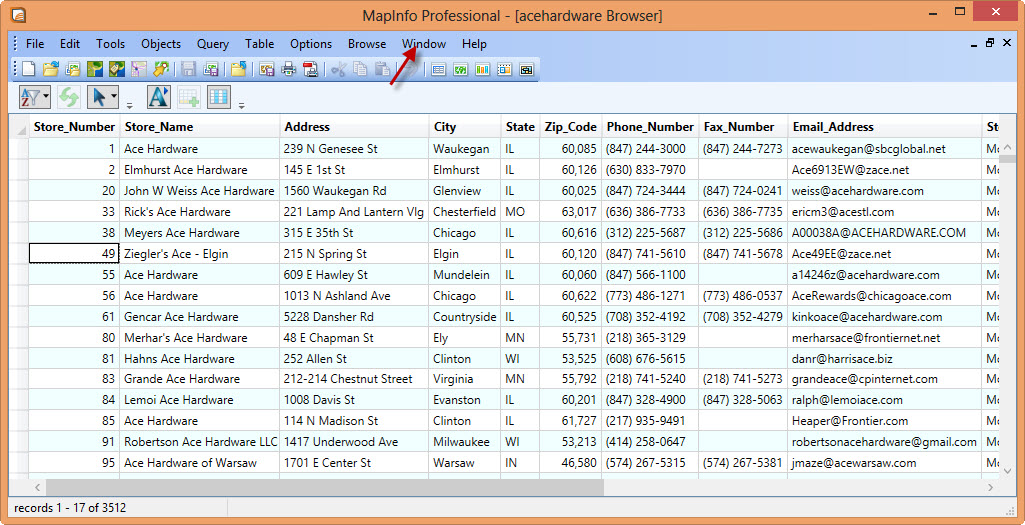
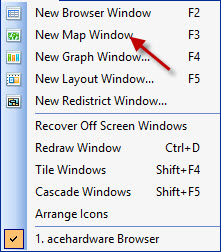
Step Seven:
Now click on the “Window” tab to open its menu. Select “New Map Window” to create the new map.
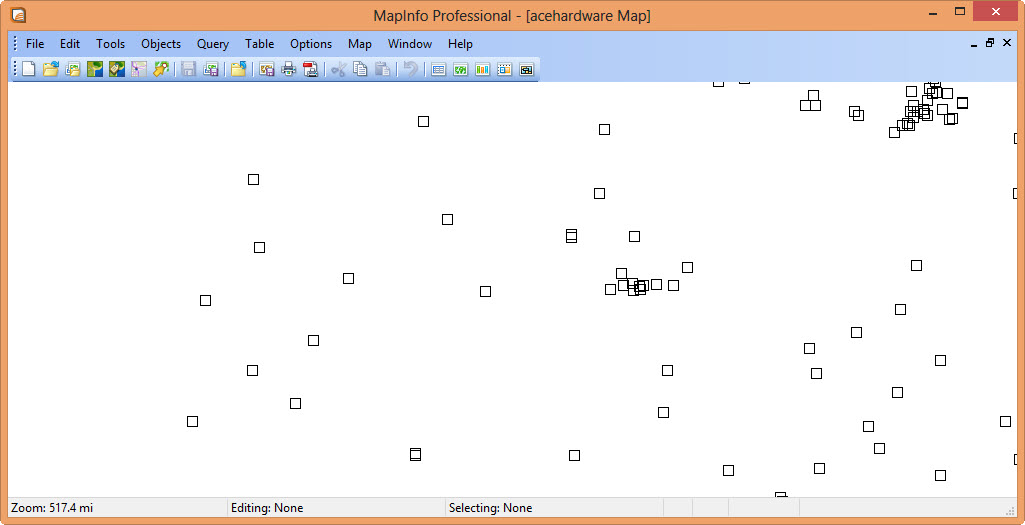
Step Eight:
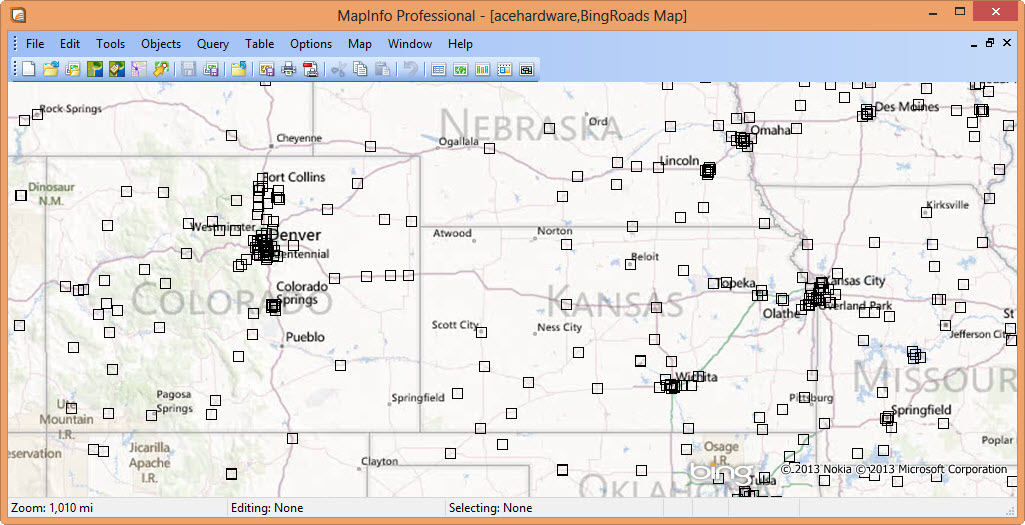
A map of sorts will have been created by the geographical coordinates, but in order to make sense of all the information that the AggData has provided, you must overlay this “map” over an actual map. If you want to scroll out you can see a bit better how the locations will fall on the map.
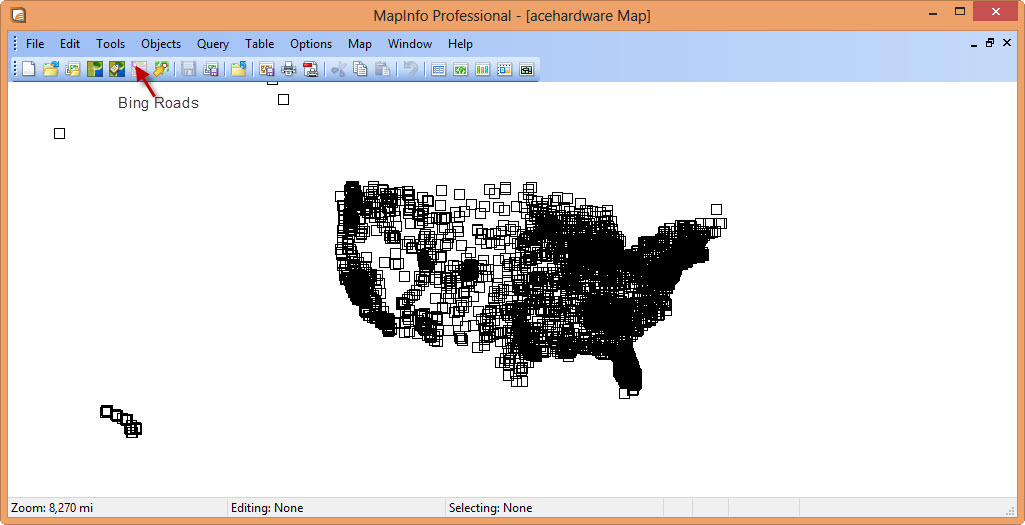
Step Nine:
Find and click the Button at the top of the page that is called “Bing Roads” (see the red arrow below).
Step Ten:
The “Bing Roads” button will overlay the coordinates provided by the AggData on top of a map.
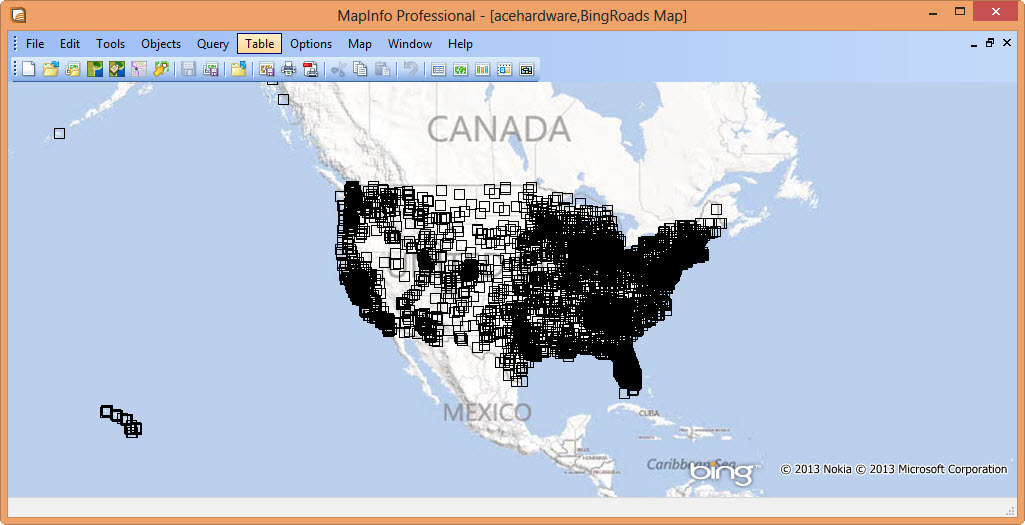
You can scroll in to see smaller areas or specific places according to your needs.
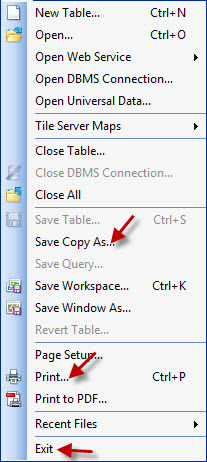
Step Eleven:
Once these steps are completed, make sure to save your map for future use. Go into the “File” tab and select “Save Copy As”, or if you prefer, select “Print” to print your new map. Finally Exit the program.
Now you can effectively create maps using AggData within Map Info.
